10 FAQs About Comb Binding
Sorting documents is an essential step to creating an organized presentation, and when combined with comb binding, it turns a stack of loose papers into a professional document. Before comb binding, careful sorting ensures that pages are in the right order for a smooth flow of information. Comb binding then securely fastens the sorted pages using a plastic comb spine, improving the document’s visual appeal and making it easy to navigate and read. Whether it’s a business report, training manual, or academic project, the combination of sorting and comb binding offers a practical solution for efficient and straightforward document presentation.
In this comprehensive guide, we address frequently asked questions (FAQ) on comb binding, unravelling the intricacies of this popular binding method. Whether you’re a novice seeking an introduction or an experienced user looking to refine your skills, this FAQ article aims to demystify comb binding, providing clarity on common queries and empowering you with the knowledge to achieve professional and organized document presentations.
10 Most FAQs When It Comes to Comb Binding
1. What is Comb Binding?
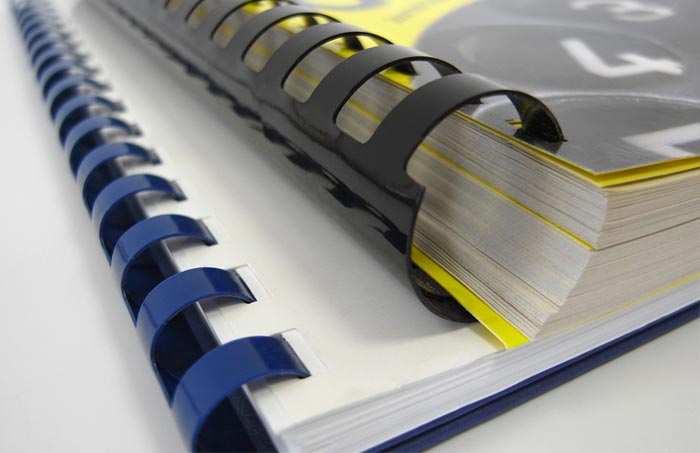
Comb binding is a popular and practical document binding method that involves the use of a plastic comb-like spine to secure the pages of a document. In the comb binding process, evenly spaced rectangular holes are punched along the edge of the document, and a plastic comb is then threaded through these holes. Once the comb is in place, it is opened, allowing the document pages to be easily inserted into the comb’s teeth. Finally, the comb is closed, securely binding the pages together.
This simple and effective binding technique is widely used for reports, catalogues, cookbooks, presentations, manuals, and other multi-page documents, offering ease of use, affordability, and the flexibility to add or remove pages as needed.
2. What are the Advantages of Using Comb Binding?
Comb binding presents several advantages that make it a popular choice for document binding needs. Firstly, its simplicity and user-friendly make it accessible for individuals without specialized binding skills. The straightforward process involves punching holes along the document’s edge and threading a plastic comb through them, allowing for quick and hassle-free assembly. This ease of use is particularly advantageous for those handling small to medium-sized binding projects.
Another notable advantage is that it accommodates a wide range of document sizes, making it suitable for various applications such as reports, manuals, and presentations. The plastic combs come in different sizes and colours, offering customization options that can enhance the document’s aesthetic appeal and align with branding requirements. Furthermore, the ability to easily add or remove pages makes comb binding a flexible choice, allowing for document updates without the need for extensive re-binding.
Also, when a comb-bound book is laid on a desk or table, the pages stay in place without requiring constant manual support. This feature enables individuals to keep their hands free for other activities, like consulting a repair manual or using a cookbook, without the need to consistently hold the book open.
Overall, comb binding strikes a balance between simplicity, versatility, and cost-effectiveness, making it an excellent option for those seeking an efficient and practical document-binding solution.
3. What are Comb Binding Spines Made of?
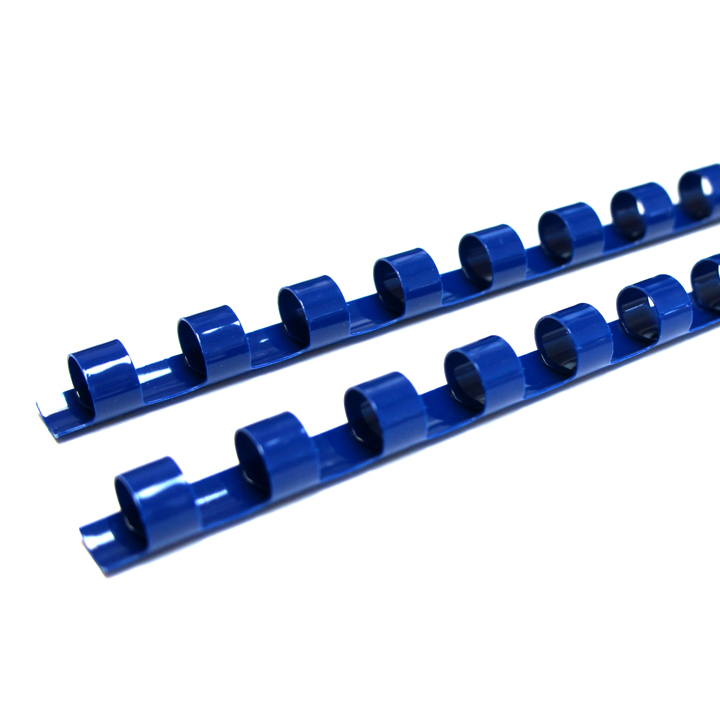
Comb binding spines, or combs, are typically made of PVC plastic, commonly polyethylene. This type of plastic is chosen for its durability and flexibility, allowing the comb to easily open and close for document binding. The use of plastic for comb binding spines makes this binding method affordable, flexible, and practical.
4. How to Add or Remove Pages?
To add or remove pages in a comb-bound document, open the comb by pulling the comb’s teeth apart manually. Once the comb is open, insert or take out the desired pages along the spine. Ensure the pages align correctly with the punched holes. After making the necessary adjustments, close the comb by pressing the teeth back together. This simple process allows for easy modification of the document’s content without the need for special tools or expertise.
It should be noted that without a comb binding machine to help spread the tines, it does take some effort to re-open them by hand. This is because the tines contain a substantial amount of tension.
5. Most Common Project That Can Be Comb Bound
Comb binding is commonly used for a variety of projects such as reports, manuals, training materials, and presentations. Its versatility makes it suitable for small to medium-sized documents, offering a straightforward and cost-effective binding solution. Businesses often utilize comb binding for internal documents like employee handbooks or procedural manuals, while educational institutions find it practical to create training materials or course packets. Additionally, comb binding is frequently chosen for project proposals, marketing presentations, and other professional documents where a polished and organized appearance is essential. Its ease of use, flexibility, and ability to accommodate different document sizes contribute to its popularity for a wide range of common projects.
6. What are the Most Common Size Ranges for Comb Binding Spines?
Determining the appropriate comb binding size is a straightforward process. Place all the pages, including covers or tab dividers, in a loose stack on a table without compressing it. Measure the thickness of the stack and add 1/8″ to that measurement. For instance, if the stack is about 1/2″ thick, adding 1/8″ results in a 5/8″ comb binding spine. In cases where you fall between sizes, it’s recommended to choose the larger size. Opting for a slightly larger comb prevents difficulty in turning pages and potential ripping, making it a more practical choice than a too-small comb.
Comb binding spines are available in diameters ranging from 1/4″ to 2″, with the 1/4″ spine suitable for stacks up to 3/16″ thick, and the 2″ spine accommodating stacks up to 1-3/4″ in thickness.
6. What Are The Minimum and Maximum Pages That Can Be Comb Bound?
For comb binding, the minimum page count is 4 pages because the minimum number of sheets that can be bound together is 2 sheets. Since each sheet has two sides, and each side counts as one page, the minimum page count is 4. As for the maximum page count, it depends on the thickness of the sheets. The largest spine diameter for comb binding is 2″, and it can bind a paper stack with an overall thickness of 1-3/4″. The specific number of pages will vary based on the thickness of each sheet.
One sheet of 70# offset paper is approximately .0058″ thick. This means there would be about 302 sheets of 70# offset in a stack measuring 1-3/4″ (1.75″) in thickness. Since each sheet of paper counts as two pages, this would mean a 2″ diameter spine could bind a maximum of 604 pages if the paper were 70# offset.
If the paper happened to be 100# cover, each sheet would be approximately .011″ thick. This means there would be about 159 sheets of 100# cover in a stack measuring 1-3/4″ (1.75″) in thickness. Again, since each sheet of paper counts as two pages, this means a 2″ diameter spine could bind a maximum of 318 pages if the paper were 100# cover.
9. Equipment You’ll Need When Comb Binding Documents

To comb bind documents, you’ll need a set of essential equipment. Firstly, a comb binding machine is crucial; this device punches evenly spaced holes along the edge of the document. One good example is the C-12 Comb Binding Machine, an entry-level, but heavy-duty machine. There are options for using an electric punch machine, and also a multi-punch unit that can accommodate different dies for punching coil and wire. like the Versamac.
The comb opener, often integrated into the same machine, allows you to open the comb for easy threading of the pages. A comb selection is necessary based on the document’s thickness, ranging from 1/4″ to 2″. Additionally, a paper cutter ensures clean, precise edges for a professional finish. It’s recommended to have a sturdy table for a stable work surface. For accurate measurements, a ruler or calliper helps determine the document’s thickness and select an appropriate comb size. Finally, considering safety, having a waste bin nearby for punched paper remnants contributes to a tidy workspace. With these essential tools, you can efficiently comb bind documents for a polished and organized presentation.
10. Factors To Consider Before Buying a Comb Binding Machine
Before investing in a comb binding machine, several key factors should be considered to ensure the right choice for your binding needs. Firstly, assess the volume of documents you plan to bind, as machines vary in their punching and binding capacities. Consider the size and format of the documents, ensuring the machine accommodates your intended range. The punching pattern, adjustable margins, and punching depth are essential features to evaluate for customization options. Look for user-friendly machines with easy adjustments and intuitive controls, especially if multiple users will operate it. Durability and build quality are crucial for long-term use, so reviews and product specifications should be examined. Finally, factor in your budget, considering both the initial machine cost and ongoing expenses for binding supplies. By carefully weighing these considerations, you can make an informed decision and choose a comb binding machine that aligns with your specific requirements.
Are you a business owner seeking to enhance your document organization and presentation capabilities? Consider the efficiency and professionalism that comb binding machines can bring to your operations. Contact us today to explore a range of comb binding solutions tailored to your specific needs, and elevate the way you present documents in your business.